Tuesday, July 26, 2011

Little White Chair

We recently overhauled our Master bedroom.
 (Or should I say, "Started" to Overhaul our Master bedroom.)

I chose a completely "out of the norm" color for the walls called Teal Zeal (but I modified it by adding some additional white to lighten it up) And we hung crown molding, and added baseboard molding, gave our windows frames and sills, and installed Berber carpet over the cold hardwood floors.

The room is not complete, but don't worry I do plan to have a Reveal post when it is finished.

I was going for a fun beach spa like space. I chose a white quilt with bright flowers including teals, pinks, yellow, and reds. Oh my, I can't wait to finish the room and accessorize!!

I also decided to add a small writing desk in our room, and wanted a chair to go with it, you know to write cards, and letters, and my memoirs......Reality check time.... The chair is purely going to be for decoration, and hanging bras and my purse on!!

So anyway, I found this little lovely at a local yard sale. Perfect Size, Perfect Style, not perfect color, not perfect fabric...but are you ready for this...Perfect Price......TWO DOLLARS!!

BEFORE

 Nice fabric..ewww


We gave her a coat of fresh white Krylon Spray paint and Recovered the seat with a Pinkish/Salmonish/Reddish fabric.

And here she is!


Actually, it will probably look more like this...with my purse sitting on it!


Total cost? $10.29

Chair $2
Fabric 3/4 yard sale price $8.29
Spray Paint Free(Leftover from another project)


Linking to:


southern hospitality


Cherished Treasures”=
Photobucket

Monday, July 25, 2011

Chalkboard Closet

son has been asking me for months now for a chalkboard for his room.

I finally gave in and decided that we would make a small chalkboard on his closet door.His room is only about 10 x 10 and one entire wall is two huge metal closet doors.

When we transitioned from toddler room to kid room, we let him choose the wall color, and decorative accents. The colors are mainly primary with emphasis on blue and red. The theme is transportation.

His walls are Buzz Lightyear Blue and we kept the wainscoting from when his room was a nursery to break up the bright blue color. The closet doors were painted with a coat of white, and believe it or not, as ugly as they are, they actually help add light and brighten up his small space.

This project was my very first experience with CHALKBOARD paint. I didn't want traditional black or green, so we decided on blue, and picked up a small container at JoAnn's. *$6.99
(I forgot my coupon for 40% off non sale items, and the cashier would not let me have the discount without it, Boo!)

I started by having E stand in front of the closet door and had him reach as far as he could. Then I marked the height based on his reach. I used a tape measure and decided on making a 2' square chalkboard.

I measured all 4 sides, used a level, and taped off the square.


Then, using a foam brush, I painted the chalkboard.


I let it dry for an hour, then added a second coat as per the instructions on the container. When dry, I peeled the tape off and decided to give the chalkboard a red border.

I  put tape on the inside of the blue painted square and then I placed a piece of the painters tape against the border of the blue square  and added a square all of the way around the outer edge to make the area for the frame.


I removed the inner pieces of tape, and painted red.

After 24 hours, I rubbed chalk on the entire chalkboard surface, and then used a sock as an eraser to remove.
(as per instructions on the paint)


He loves it!


Linking to:


PhotobucketTip Junkie handmade projects


Saturday, July 16, 2011

Family Rules Sign

I fell in love with the following signs at a local boutique shop in town.


I went into the store and found that they were created by a woman named Kristi in Leesburg, VA. She has the most adorable typography signs, and Etsy shop. Her business is called Barn Owl Primitives.

Her Family Rules Sign was my inspiration for my latest project.
My total investment was $10, and 3 hours.
Supplies included:
the other half of the plywood piece
 (that I used for THIS project)
Primer
Red and Green Craft Paint
Glaze
Foam Brushes
Letter Stickers

I started with primed plywood

Together as a family, we came up with "OUR LIST" of twelve Family rules

It was a beautiful day out, so I decided to do this project outside on the deck.

I measured the wood, and divided by the 12 rules so that I would have even spacing between line.


Then, I cut out sticker letters for each phrase and laid everything out on the wood.


Next, I peeled and stuck each letter onto the board.
( If I make another one of these, I may just use carbon paper and transfer the text onto the wood..This was a very time consuming part of this project.)


***Make yourself a note***
If there is a breeze while you are trying to place hundreds of cut out letters onto a wooden board, it's smart to use a magazine to hold down the "loose letters" so that they don't end up all over the yard or between the deck slats...not that I would know this from experience or anything..grrrrrrr.

I painted over the entire board with green craft paint using a 2" foam brush, and made uneven strokes.


When this was dry, I went over the green with red craft paint, leaving some of the green to show through, giving it an aged look.


When the paint was dry, I carefully peeled each letter away, while watching "Annie" on tv, since the 80 degree day turned into a humid 94 pretty quickly, and I moved the project indoors!


The words are very bright white at this point, and since I was going for an aged look, I covered the entire sign with the left over glaze from my American Flag project and then wiped off the excess glaze.

I placed a picture hanging hook on the back, and put a nail in the wall...and viola,

Here's the finished project!!!


Linking up to:


Cherished Treasures”=


LookWhatMomFound...and Dad too!Funky Junk's Sat Nite Special


UndertheTableandDreaming

Friday, July 15, 2011

Winning= FUN!!

I am soo excited to learn that I have won a giveaway to the Etsy shop, LoftyLou

Lofty Lou

Jody, has beautiful, GIRLIE things!!

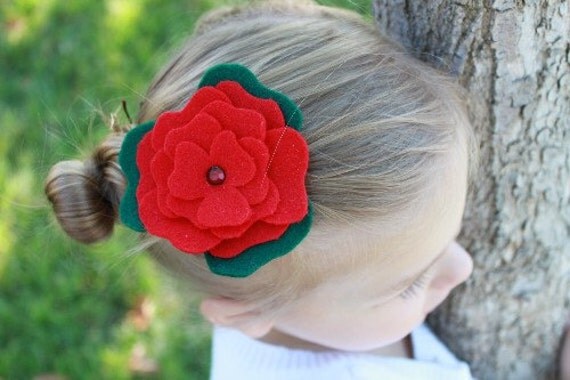
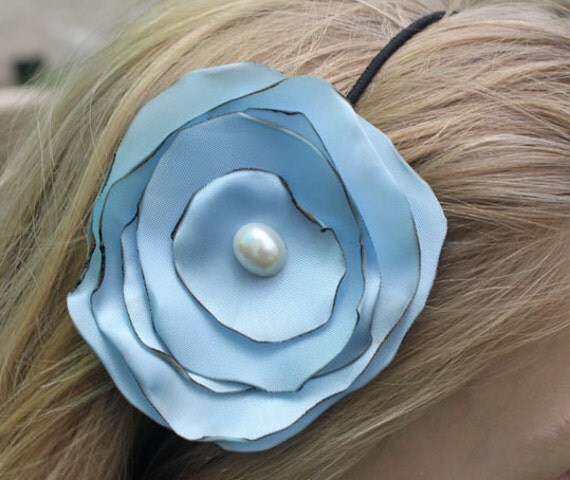
My favorites are:

Peony

and

Blue Organza Headband

Check out Jody's Etsy shop!


The giveaway was hosted by Sam from THE JUNK HOUSE, thanks again SAM!


Sam's blog is about her experiences with decorating via thrifting and crafting of her first home! check out her page and let her know that I sent you!

This is one of my favorite projects that she's shared so far! Cute project with a $1 frame turned white board/weekly menu list!


This was a wonderful surprise and start to my weekend..looks like luck is on my side, hopefully it will carry over while treasure hunting tomorrow!